
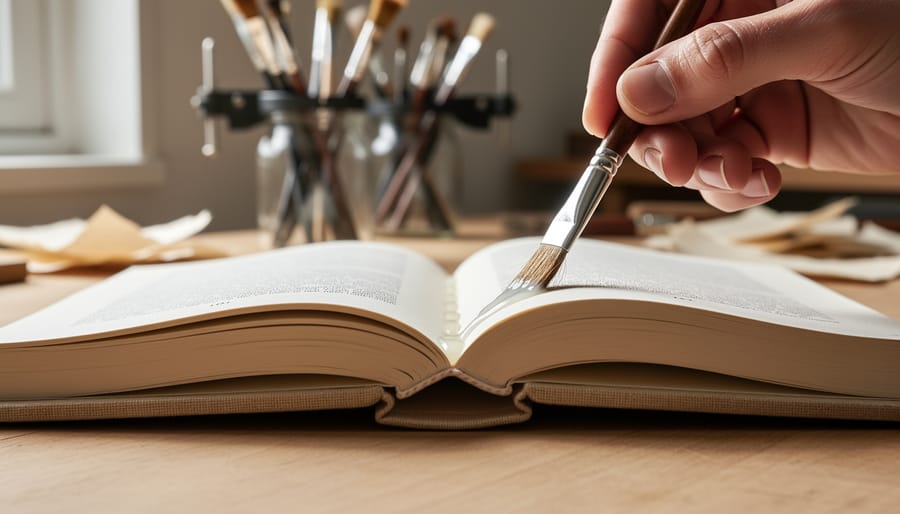
How to Use Book Glue Binding: A Complete Guide to Choosing and Applying the Right Adhesive
PVA (polyvinyl acetate) is a synthetic polymer that dries clear and flexible, unlike hide glue or rubber cement.
Binding a book with glue comes down to choosing the right adhesive and applying it correctly, and for most projects, archival-quality PVA (polyvinyl acetate) glue is your best friend. This versatile adhesive dries clear, remains flexible over time, and won’t yellow or damage your pages, making it the go-to choice for everything from repairing a beloved novel to crafting handmade journals. Whether you’re rescuing a paperback with a cracked spine or building your own sketchbook from scratch, the process takes about 30 minutes of active work plus drying time, and requires no special equipment beyond a brush, clamps, and the glue itself.
The recent surge in DIY bookbinding isn’t just about saving money. There’s something deeply satisfying about holding a book you’ve bound yourself, knowing it will last for years because you used proper archival materials. You’re joining a community of readers and makers who refuse to let a damaged book go to waste or settle for mass-produced journals when they can create something personal. Professional-grade book glues like 16oz Professional Book Glue or 8oz Archival PVA Adhesive Glue deliver the same pH-neutral, acid-free formula used by conservators and small-press publishers, and they’re surprisingly affordable and easy to work with.
This guide walks you through selecting the right adhesive for your specific project, preparing your materials safely, and executing clean, professional-looking bindings that will stand up to repeated use. You’ll also learn how to verify your work held properly and troubleshoot common issues before they become permanent problems.
What You’ll Need for Book Glue Binding
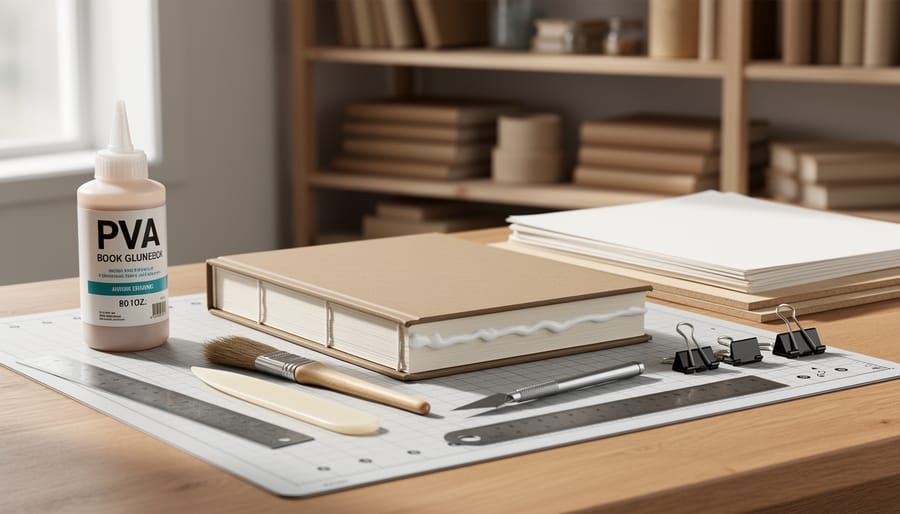
Gathering your supplies before you start makes the entire book glue binding process smoother and more enjoyable. You don’t need a professional studio or expensive equipment, just a few key items that work together to create strong, lasting bindings.
- Book binding glue: Choose an archival-quality PVA adhesive like Professional Book Glue (16oz, pH neutral), Archival PVA Adhesive Glue (8oz, acid-free), or 250g Book Glue (neutral pH, remains flexible when dry). These specialized adhesives stay clear and won’t yellow or damage pages over time.
- Brushes or applicators: A flat, stiff-bristled brush (one to two inches wide) spreads glue evenly along spines. Disposable foam brushes work well for beginners and cost less than a dollar each.
- Clamps: C-clamps or spring clamps hold pages firmly while the adhesive sets. Two clamps minimum; four provides better pressure distribution for larger books.
- Wax paper or parchment paper: Protects covers and prevents pages from sticking together where you don’t want them to. Cut pieces larger than your book’s dimensions.
- Bone folder: This smooth tool presses pages flat and works air bubbles out of glue applications. Plastic alternatives work fine, though traditional bone folder tools offer better control.
- Scrap cardboard: Place under your project to catch drips and protect your work surface.
- Clean cloth or paper towels: Keep these handy for wiping away excess glue immediately.
If you’re repairing an existing book, you’ll also need a craft knife or small saw to remove old, brittle adhesive from the spine. For new bindings, have your text block (the pages themselves) already printed and trimmed to size, plus cover materials if you’re creating a full hardcover or softcover binding.
Most of these supplies are reusable across multiple projects, making book binding an accessible craft once you’ve assembled your basic toolkit. Start with what you have, even improvised weights can substitute for clamps in a pinch.
Choosing the Right Glue for Your Book Binding Project
Not all adhesives are created equal when it comes to bookbinding. The glue you choose will determine whether your project lasts for decades or falls apart within months, so understanding what separates archival-quality options from everyday craft glues matters enormously.
The gold standard for book binding projects is PVA (polyvinyl acetate) adhesive specifically formulated for archival work. These specialized glues share three critical characteristics: they’re acid-free (preventing paper degradation over time), they dry completely clear (no yellowing or visible residue), and they remain flexible after curing (allowing books to open and close without cracking). Professional Book Glue, available in a 16oz size, exemplifies these qualities with its archival quality, pH neutral formula that stays clear and flexible even years after application.
For projects requiring the highest archival standards premium options like Archival PVA Adhesive Glue deliver exceptional performance in an 8oz format. This acid-free, crystal-clear adhesive works beautifully for both bookbinding and delicate crafting applications where permanence matters. Similarly, 250g Book Glue offers a neutral pH PVA formula that dries clear and maintains flexibility, making it reliable for bookbinding, repair work, framing, and collages.
Matching glue to your specific project improves results considerably. For binding new books or journals from scratch, you’ll want a larger quantity like the 16oz Professional Book Glue, which provides enough adhesive for multiple spines without rushing. Repair projects and scrapbooking work well with the 8oz Archival PVA, since you’re typically working on smaller areas that demand precision. DIY projects and collages benefit from the 250g neutral pH option, which balances quality with an accessible size for experimenting.
Avoid regular craft glues, school glues, or hot glue for any book you intend to keep. These adhesives often contain acids that yellow pages, turn brittle within a year or two, and lack the flexibility needed for repeated opening and closing. The few dollars more you’ll spend on proper bookbinding adhesive translates directly into projects that honor the effort you’re putting in.
Before You Begin: Important Safety and Preparation Tips
Setting up your workspace properly makes book glue binding safer and more enjoyable. Start by choosing a flat, sturdy surface in a room with good airflow, while modern archival PVA adhesives like the Professional Book Glue or Archival PVA Adhesive Glue are low-odor and non-toxic, working near an open window or in a well-ventilated area keeps your space comfortable during longer projects.
Cover your work surface with newspaper, a plastic mat, or an old cloth to catch drips and spills. Gather all your materials before you start: your chosen adhesive, brushes or applicators, clamps, wax paper, a bone folder, and clean rags or paper towels within easy reach. Good lighting matters more than you might think, you need to see clearly to apply glue evenly and spot any gaps or excess before it dries.
Keep a small bowl of water and a clean cloth nearby for quick cleanup. If glue does get somewhere it shouldn’t, wipe it immediately with a damp cloth while it’s still wet. Once PVA adhesives dry clear and flexible, they become much harder to remove without damaging your work. Organize your space so you can move smoothly from one step to the next without fumbling for tools mid-project. A tidy, well-prepared workspace transforms book binding from stressful to meditative, letting you focus on creating something beautiful that will last for years.
Step-by-Step: How to Apply Book Glue for Binding
Preparing Your Book Spine
The foundation of a strong binding starts with a clean, even spine. Begin by stacking your pages and tapping them gently on a flat surface to align the edges perfectly. If you’re repairing an existing book, you’ll need to remove the old adhesive first. Use a craft knife or sandpaper to carefully scrape away dried glue, working slowly to avoid tearing pages. For stubborn residue, a bone folder can help lift away bits without damaging paper fibers.
Once the spine is clean, check that all pages sit flush. Any misaligned sheets will create weak spots in your binding. Secure the aligned pages firmly in a clamp or press, leaving the spine edge exposed and accessible. The surface should be smooth and free of debris, even small paper fragments or dust can prevent the new adhesive from bonding properly.
For new bindings, lightly roughen the spine edge with fine sandpaper. This creates tiny grooves that help the glue grip more effectively, ensuring your pages stay together through years of reading and handling.
Applying the Adhesive
Start with a thin, even coat. Dip your brush or applicator lightly into the glue, then wipe off any excess against the container edge. You want enough adhesive to create a strong bond, but not so much that it squeezes out when clamped. A good rule of thumb is to apply a layer thin enough that you can still see the book’s spine material through it.
Work in smooth, steady strokes from top to bottom of the spine. Brush in the same direction rather than back and forth, which can create air bubbles or uneven coverage. Pay extra attention to the edges where pages meet the spine, as these areas take the most stress when the book is opened. If you spot any dry patches, add a touch more glue immediately rather than waiting.
Timing matters here. PVA adhesives like the archival options stay workable for a few minutes, but they start setting quickly. Move deliberately without rushing. If you’re binding a thick book or need extra strength, you can apply a second thin layer after the first has become tacky but not fully dry. This creates better penetration between pages than one heavy application.
Keep a damp cloth nearby to wipe your brush periodically and catch any drips before they land on your book’s cover or text block.
Clamping and Drying
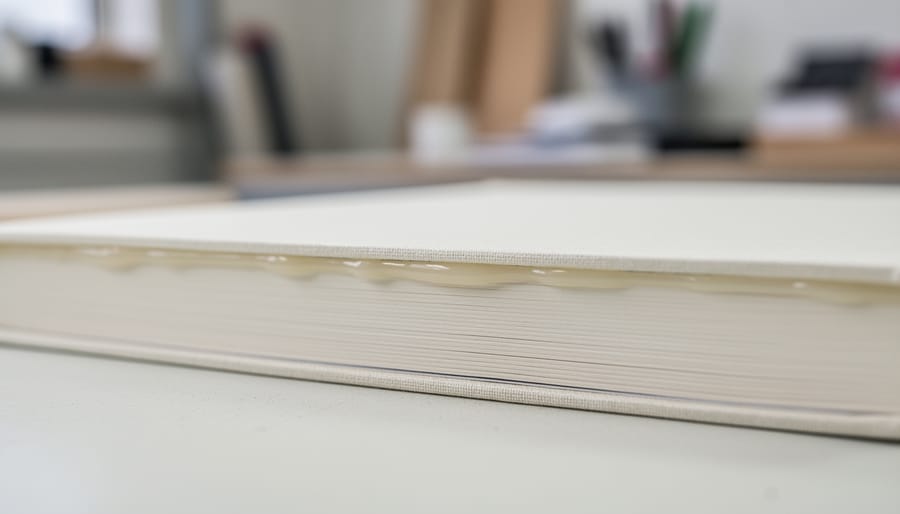
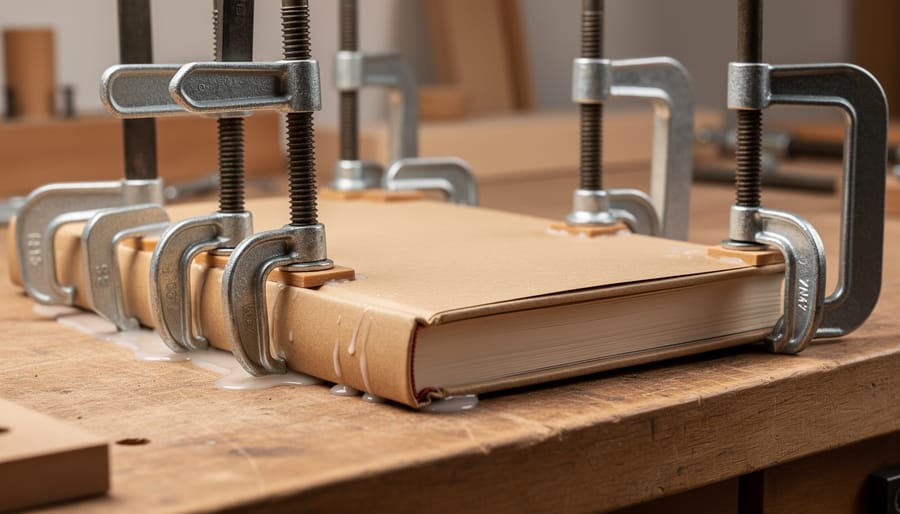
Once you’ve applied the glue evenly along the spine, proper clamping makes all the difference between a binding that holds for years and one that fails within weeks. Place a sheet of wax paper or parchment paper between the spine and your clamp to prevent any squeezed-out adhesive from sticking where it shouldn’t. Position the clamps firmly but not so tight that glue gets forced out completely, you want even pressure across the entire spine area.
Keep the book clamped upright if possible, which lets gravity help distribute the adhesive evenly. Most quality PVA adhesives need at least two to four hours of initial clamping time, but letting the book rest overnight produces stronger results. The glue should feel dry to the touch before you remove the clamps, though full curing takes 24 hours.
For bindings that will see heavy use, journals you’ll write in daily or repair projects on frequently handled books, consider applying a second thin layer after the first has fully dried. Let this reinforcement layer cure completely before testing the binding’s flexibility. Patience during drying prevents weak spots that show up later.
How to Know Your Book Binding Is Successful
Once your book has dried completely, typically 24 hours for most PVA adhesives, though some projects benefit from 48 hours, it’s time to assess your work. A successful binding reveals itself through both visual inspection and gentle handling tests that tell you whether your adhesive has created a lasting bond.
Start by examining the spine closely in good lighting. Quality binding shows a smooth, even surface where the glue has penetrated between pages without creating lumps or ridges. The adhesive should be completely clear if you used archival PVA, and you shouldn’t see any white streaks or cloudy patches that indicate incomplete drying. Run your finger lightly along the spine edge; it should feel uniform, with no sticky residue or rough spots where glue pooled unevenly.
Now comes the flexibility test. Hold the book by its covers and let it fall open naturally to various points. The spine should bend smoothly without resistance, and pages should stay firmly attached at the binding edge. Gently pull the book open wider than you would for normal reading, not forcefully, but enough to stress-test the bond. You shouldn’t hear any crackling or tearing sounds, and no gaps should appear between the spine and the page edges.
Check a few individual pages by very carefully applying slight outward pressure near the binding. They should hold firmly without any give. If a page shifts or you feel looseness, that’s your signal that the glue didn’t fully penetrate or the coverage was uneven in that spot.
Common issues have straightforward solutions. Visible glue residue on covers or pages can be gently removed with a barely-damp cloth while the adhesive is still pliable, or carefully scraped away with a bone folder once fully dry. Pages pulling loose at specific points usually mean those areas need cleaning and a second targeted application of adhesive, remove the book from the clamp, apply fresh glue to the weak spots, and re-clamp for another drying cycle. Uneven drying that leaves soft patches means your workspace was too humid or cold; move the book to a warmer, drier location and give it more time.
If you notice the spine cracking when opened or pages beginning to separate after initial success, apply a thin reinforcement layer of PVA along the spine exterior, working it gently into any emerging gaps. This preventive step often saves a binding before it fails completely, especially on books that will see heavy use.
Beyond Basic Binding: Creative Uses for Book Glue
Once you’ve mastered the basics of spine binding, those archival-quality adhesives open up a world of creative possibilities. The same PVA glues that create durable book spines work beautifully for other literary crafts because they dry clear, remain flexible, and won’t yellow or damage paper over time.
Book repair becomes entirely manageable with the right glue. Reattaching loose pages, securing torn corners, or reinforcing a weakened spine all benefit from the acid-free properties of professional book glue. You can preserve family heirlooms, vintage finds, and well-loved paperbacks without worrying about long-term damage. Apply a thin layer where needed, press gently, and let it cure completely.
Creating a DIY journal or scrapbook gives you complete control over materials and design. Use archival PVA to attach signatures, secure decorative papers, or bind handmade covers. The flexibility of quality book glue means your journal will withstand daily use and repeated openings without pages pulling loose.
For mixed projects, these adhesives excel at framing delicate papers, mounting pressed flowers between pages, or assembling collages that need to last. They work on fabric book covers, ribbon bookmarks sewn into bindings, and layered paper art. If you’re experimenting with saddle stitch bindings, a touch of PVA reinforces the fold before stitching.
The beauty of archival adhesives is that they protect your creative work the same way they protect treasured books. Experiment freely, knowing your projects will stand the test of time.
Common Questions About Book Glue Binding
Can you use regular craft glue for bookbinding?
While standard craft glue might work for temporary projects, it’s not recommended for serious bookbinding. Regular glues often contain acids that yellow pages over time, and they tend to dry brittle rather than flexible. The archival-quality PVA adhesives designed for bookbinding, like the 16oz Professional Book Glue or 8oz Archival PVA Adhesive, are acid-free and remain flexible after drying, which means your books can open and close without the spine cracking. If you’re binding something you care about keeping, the few extra dollars for proper bookbinding glue makes a real difference.
How long does book glue typically last once applied?
When you use archival PVA adhesives with neutral pH, your binding should last decades with proper care. These adhesives are formulated for longevity, which is why libraries and conservators rely on them for repairs. The glue itself, in the bottle, usually stays usable for a year or two if you keep the cap tight and store it at room temperature. Once applied and fully cured (usually 24 hours), the bond is permanent unless you intentionally reverse it.
What’s the difference between PVA and other adhesives?
PVA (polyvinyl acetate) is a synthetic polymer that dries clear and flexible, unlike hide glue or rubber cement. Book-grade PVA is acid-free and reversible with moisture, making it ideal for both new bindings and repairs without causing long-term damage to paper.
Is book glue safe for vintage or rare books?
Yes, archival PVA glues like the 250g neutral pH option are specifically formulated for conservation work. They’re acid-free, won’t yellow or stain delicate pages, and can be carefully removed if needed, which is why professionals use them on valuable volumes.
How do you remove old book glue?
Gently scrape away loose, deteriorated adhesive with a bone folder or dull knife, then use a barely damp cotton swab to soften remaining residue. Work slowly to avoid tearing pages, and let the area dry completely before applying fresh glue.
Readers often ask whether these adhesives work for projects beyond traditional bookbinding. The answer is absolutely, the same qualities that make them perfect for books (flexibility, clarity, archival safety) make them excellent for framing delicate papers, creating collages, and assembling handmade journals or bookmark guides. The 250g Book Glue, for instance, is specifically marketed for bookbinding, repair, framing, and collage work. Once you have a bottle on hand, you’ll find yourself reaching for it whenever precision and permanence matter.
You’ve learned the essentials of book glue binding, and now it’s your turn to bring a project to life. Whether you’re repairing a cherished novel with worn binding, creating a custom journal for your thoughts, or preserving family recipes in a handmade volume, the process becomes intuitive with practice. The right adhesive makes all the difference, archival-quality PVA glues offer the flexibility and permanence that ensure your work lasts for years, maybe even generations.
Start small if you’re feeling uncertain. A simple repair or a thin journal lets you build confidence with the techniques before tackling more ambitious bindings. Remember that even experienced bookbinders began exactly where you are now, learning through careful observation and hands-on experience. The satisfaction of opening a book you’ve bound yourself, feeling the spine flex smoothly under your fingers, knowing you created something both beautiful and functional, that’s what makes this craft so rewarding.
We’d love to hear how your first binding project goes. Did you discover a technique that worked especially well? Run into a challenge you overcame? The WikiLivres community thrives on these shared experiences. Your questions help other readers, and your successes inspire someone else to pick up a brush and start their own bookbinding journey. Connect with fellow book lovers who understand that preserving and creating books is an act of devotion to the stories and ideas we treasure most.
About Author
